Darkana's Design


As time goes by I will be working on this tutorial, not the stuff in the box but the box it self...I will be showing you how to add the stuff to make it look like it is in the box. The tubes I used with this toy box can be found here
1. To start off open up a new image 500x500 (gives plenty of room to work with). Add a new layer.
2. Make a rectangle using your selection tool. Fill it in white, then go to use your favorite pattern of wood. For this tutorial I used this one 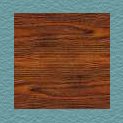 and fill it in with the wood pattern.
3. copy your new filled in rectangle and paste as a new layer.
4. Hide the 1 new layer you just created and make a new layer. Draw a smaller rectangle (length wise), match it to the corners of the bigger rectangle. But make sure the new layer is highlighted.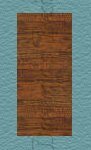 This is what it should look like. Before we move on copy this image and make a new image.
5. Now click on deformation located near the top on the side. and with holding down control move up one of the sides so it should look like this 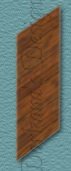
6. Copy and paste as a new layer (this should be the exact same copy b4 we deformed it). Click on deformation agian. now instead of holding down control we hold down shift so the bottom doesn't go up as well.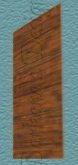 .
.
7. Now line up those 3 pieces (excluding the back of the box)and merge all visable layers.  So it should look like this.
8. Now for the back of the box. Make the merged image disapear for a bit by clicking on the sunglasses in the layer window. All you should have is the back of the box from a few steps ago. Copy that image and paste again as a new layer (for the lid of the box). Line up the 2 images so they are on top of each other like this 
9. Highlight the top of the box layer. and use your deformation tool to scrunch the bottom and widen the sides. So what you should have would be simular to this.
10. You can go ahead and merge those 2 layers together.
11. Click on the first merges images and apply eye candy inner bevel. I used these settings but you can play around a bit to get the image you would like.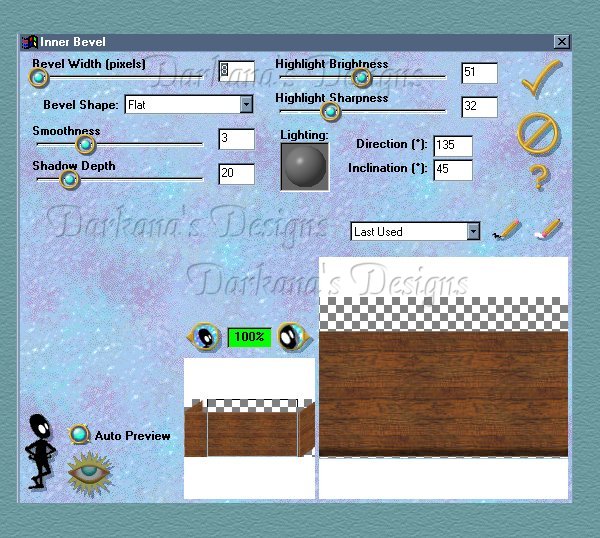
12. You can also apply a drop shadow and these are the settings I used 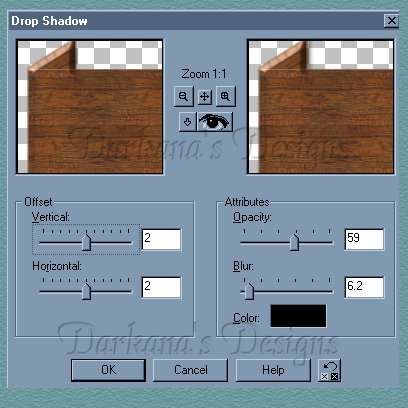
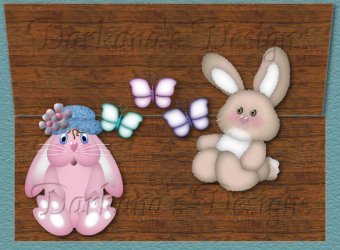
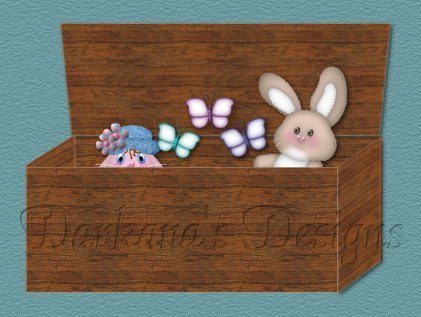
13. Now you can add the goodies. The fun part. You don not however want to merge the 2 together until you have ever thing you want inside...the you can only add stuff to the outside and to the back...but not the inside.
14. so here is an example of what i described
15. For the hinges it is pretty simple. Find a ding bat font you like and use a blade pro preset on it...the basic gold is what I used. I zipped the file as a tube all you have to do is click here to download it.
16. Open up the image use your selction tool and click so that those dotted lines are around it and use blade pro and then size it down to 50 pixels and poof add it into the image as a new layer.
17. Now you might be wondering about the leather chord that hooks to the back and front of the toy box (oh the name escapes me at the moment). Any ways you ope up a new image 300x300 transparent.
18. and you click on the pencil making sure you are using the bezier curve width 5. When drawing that line though make sure you have your wood pattern when you start it (it just makes it easier...thats all)
19. Apply the inner bevel from eye candy, drop shadow and poof there you go.
| HOME
| GRAPHICS | S.GLOBES |
FONTS
| JUST STUFF
| TUBES
| TUTORIAL | LINKS
|
ABOUT ME
| DISCLAIMER |
E-MAIL
|